

This DIY post is specifically for a purchased craft kit that you can find on my Etsy shop.
If you have seen my Etsy shop or have made your way over to my shop on this site here, you have seen the wide variety of felt banners that I sell.
They are just so easy and fun to make. So, for Halloween coming up soon (and noticing that all of my products are feminine) here is a Monster Banner Craft Kit for everyone to enjoy!


DIY Monster Banner Craft Kit
Step One: Purchase Your Craft Kit and Gather Your Supplies
You will first need to purchase your DIY Kit from my Etsy Shop HERE
There are also other craft kits in my Etsy shop with instructions in my blog here if you would like to see other whimsical crafts to try.
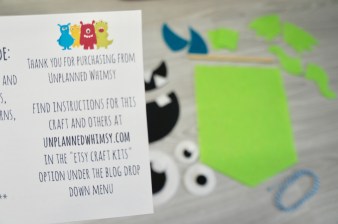
In this purchased kit you will receive:

- One Precut Lime Green Felt Banner
- Three Precut Felt White and Black Eyes (for your choosing)
- Two Precut Black Felt Mouths (for your choosing)
- Six Precut White Felt Teeth: 3 triangular and 3 squared (for your choosing)
- Two Precut Aqua Felt Horns
- Two Precut Lime Green Felt Arms (for your choosing, or they can be 2 arms and 2 legs)
- Precut Felt Squares
- Aqua and White Twine
- Dowel Rod
- Adhesive Not Included

Additional Information:
- Banner is about 8.5 x 6 inches in size
- Banner has precut holes to thread the wooden dowel through
- Dowel Rod is 6 inches in length and 0.25 inches in diameter


- *Additionally you will need adhesive to hold your project together.
- I recommend using a glue gun; however, if you would like to make this a more child-friendly project feel free to use felt glue.
- A glue gun provides a shorter waiting time for drying, allowing your project to be finished sooner. (Which is nice when photographing step-by-step directions)
- Felt glue will work fine, but there will be delayed crafting as you wait for the glue to dry.
- It is up to you, so long as you do this craft safely and have fun.
Step Two: Attach the Dowel to Your Banner
Place the dowel rod through the two holes on the top of the banner.

Once the dowel is through the first hole, twist and wiggle it while pushing it through the second hole.


When the dowel is all the way through, center it so that it looks like the photo below. This dowel-side up is the back of your banner.

Step Three: Add the Twine
Attaching the Twine:
First, you want to flip the banner dowel-side up (as in the picture above).
Next, you will be threading your twine through the same holes as the dowel, one side at a time.


Once the thread is through, tie it to the dowel.


Follow the same steps on the other side of the dowel.


Securing the Twine to the Back of the Banner:
For this step you will need the two felt squares provided in your kit.
Take your felt square and add glue to it. Then, lift the square and place it over top of the knotted twine on the back of the banner.


**Tip: when placing the square over the dowel and twine, gently fold it over while keeping the banner itself flat. This will ensure that the banner will not have a large crease on the front.


Shortening the Twine After Securing Your Knots:
Simply wrap the twine around the dowel in the front of the banner.


Step Four: Layout Your Monster
Before you add glue to anything, layout how you want your monster to look.
You can actually do this before you add your dowel if you want (which is what we ended up doing for the photo shoot).


Once you know how you want your monster to look, then you can glue down its facial features arms.
Step Five: Building Your Monster
Simply glue down each piece into place.
Mouth:


Eyes:


Teeth:


Arms (and or legs):

Horns:


If you attach the horns over the twine, be sure that you have wrapped it to the exact length you wish it to be.
Step Ten: Enjoy!


You did such a great job!
If you purchase this product or create a something inspired by this DIY please share your photos either in the comments below or on Unplanned Whimsy’s Facebook Page HERE because I’d love to see them!

