

This DIY post is specifically for a purchased craft kit that you can find on my Etsy shop.
If you have seen my Etsy shop or have made your way over to my shop on this site here, you have seen the wide variety of felt banners that I sell.
I love making them and watching customers at craft shows pick them out in person. It is a good way to get a look into their personality.
The last craft show that I attended was at a popular company in town who was hosting vendors in one of their large office locations to raise money for hunger relief. It was a fun event because the craft show day also happened to be “take your kids to work day” so having a booth full of color drew in quite a bit of little customers. I loved getting to see reactions to my products from a kids point of view, as well as the product suggestions I was given. From this small marketing group, I learned that I need more unicorns, mermaids, llamas, glitter, and craft kits in my shop. I took note and here is one of those kits ready for you!

Unicorn Banner Craft Kit
Step One: Purchase Your Craft Kit
You will first need to purchase your DIY Kit from my Etsy Shop HERE
There are also other craft kits in my Etsy shop with instructions here at unplannedwhimsy.com if you would like to see other whimsical crafts to try.

Step Two: Gather Your Supplies

In this purchased kit you will receive:
- Precut Felt White Banner (eyelashes are attached)
- Precut Felt Pink Snout/ Nose (nose and mouth on snout are attached)
- Precut Felt White and Pink Ears (outer and inner)
- Precut Felt Layers of Blue and Purple Hair
- Prepared Felt Golden Unicorn Horn (pre-glued for your ease of use)
- Precut Felt White Heart
- Yellow and White Twine
- Dowel Rod
- Adhesive Not Included
Additional Information:
- Banner is about 8.5 x 5.8 inches in size
- Banner has precut holes to thread the wooden dowel through
- Dowel Rod is 6 inches in length and 0.25 inches in diameter
- Felt pieces have been stiffened to prevent floppy ears and horn
- Twine is 18 inches in length

- Additionally you will need adhesive to hold your project together. I recommend using a glue gun; however, if you would like to make this a more child-friendly project feel free to use felt glue.
- A glue gun provides a shorter waiting time for drying, allowing your project to be finished sooner.
- Felt glue will work fine, but there will be delayed crafting as you wait for the glue to dry.
- It is up to you, so long as you do this craft safely and have fun.
Step Three: Attach the Dowel to Your Banner
Take your white banner and flip it so that the eyelashes are facing down.

Once the dowel is in the hole, twist and wiggle it while pushing so that it will reach the second hole. You can flip the banner eyelashes up to get a better visual on the dowel as you move it from one side to the other.

When the dowel is all the way through, center it so that it looks like the photos below.


Step Four: Attach the Ears
First, create your ears by gluing the two ear pieces together before gluing them to the banner.


Placing the hair onto the banner, without glueing it down, will allow you to see where the ears should go. Having a visual before using glue is always a good idea, but you can skip this step if you are a crafting dare devil. Once you have a visual for where the ears should go, glue them to the dowel.
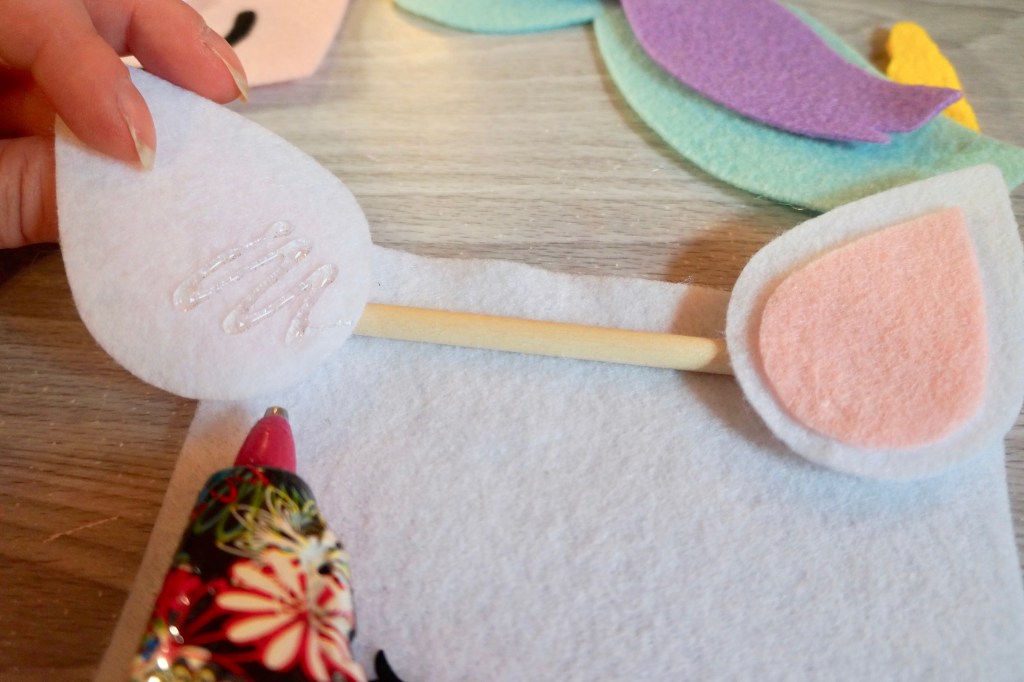

Do not glue the ears to the felt just yet. Attaching them now can disfigure the ears. You will see why not to glue them to the felt above the dowel towards the end of the project. Do not glue the ears to the felt below the dowel because doing so will tilt them forward. Basically, it will look funny when you hang it up.
Step Five: Attach the Hair and Horn
After your ears are attached I suggest laying out your hair and horn, again just to have a visual of where to place things before gluing them down.
Once you have your pieces laid down in place, you can then lift up portions of the felt pieces to add glue underneath the shape to attach it to the banner without moving it from where you have it laid. For smaller pieces, such as the horn or purple layer of hair.


I like the look of the horn between the blue and purple hair, as if it is poking out of her hair, but you can glue your banner however you wish.


Step Six: Attach the Snout
Attach the snout by alining its triangle shape to the bottom of the banner.

You can also use the suggestion earlier for the blue piece of hair, to lay the shape in place and then lift up small sections at a times to add glue without moving the piece out of place.

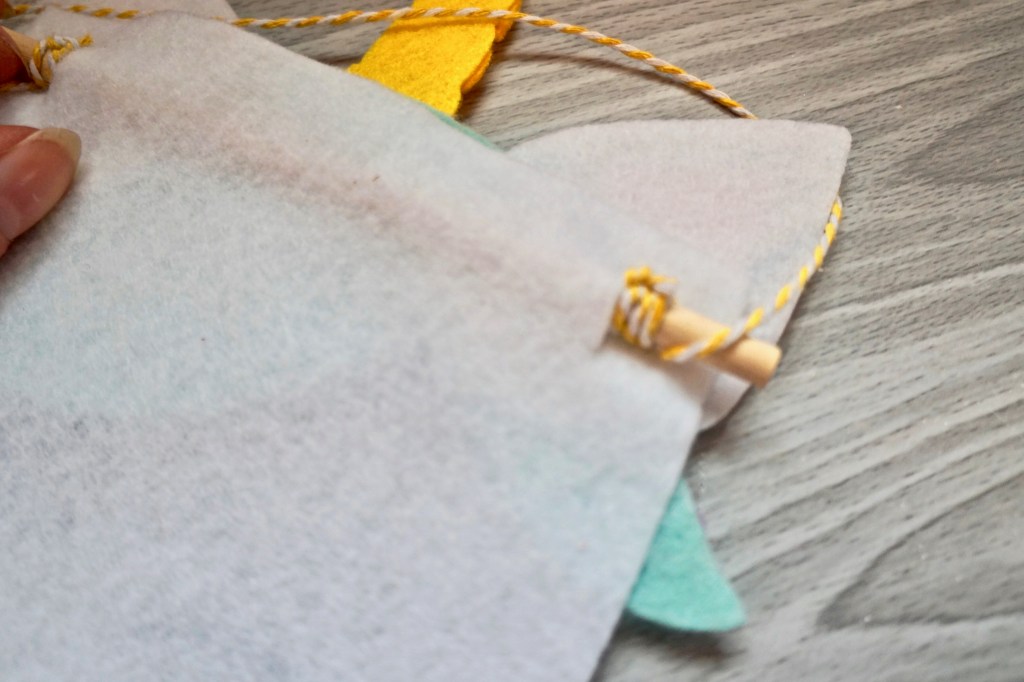
Step Seven: Add the Twine
Attaching the Twine:
First you want to flip the unicorn eyelashes down to be able to attach the twine to the back of the banner.


Shortening the Twine After Making Your Knots:
Yes, you can fight with your knot to try and undo it or possibly ruin your twine by cutting it off and redoing your knot… or you could just shorten it the easy way.


Tada!

Step Eight: Decorate Your Felt Heart
This could really be done at any time, but I saved it for the end.

Honestly, I am just messy and didn’t want to get marker ink on my fingers and then accidentally transfer that ink to the beautiful white unicorn. Lucky for you I am just a messy kid at heart, so I can test these things out.
Inside of this kit you will find a white heart. I did this so that you can add a personal touch to your craft. You can decorate your heart in any manner you choose!
You can color it with fabric markers, glitter glue, puffy paint, sharpies, sticker gems, an embroidery pattern if you would like to get super fancy, or anything else that your heart desires. You could even leave it white to show that you have a pure heart.

Step Nine:

I placed the heart in her hair as if it were a hair clip.
Step Ten: Enjoy!


You did such a great job!
If you purchase this product or create a something inspired by this DIY please share your photos either in the comments below or on Unplanned Whimsy’s Facebook Page HERE